
Hailstorms don’t just pass through they leave evidence behind. And if you’re filing a claim, that evidence is everything. Knowing how to document hail damage for an insurance claim can be the difference between a full payout and a frustrating denial. In places like Denton, where storms can hit fast and hard, homeowners who act quickly and correctly put themselves in a stronger position from day one.
This isn’t about taking a few random photos and hoping for the best. It’s about building a clear, undeniable case. A case that tells the full story of your damage. A case that insurance companies can’t easily dismiss. Let’s break it down step by step and go deeper than most guides ever will.
Why Proper Documentation Matters in a Hail Damage Insurance Claim
Documentation isn’t a formality. It’s leverage. Insurance companies don’t pay based on what you say. They pay based on what you can prove. If your documentation is weak, incomplete, or inconsistent, your claim will reflect that. Lower payouts. Longer timelines. More disputes.
Strong documentation does four things:
- Confirms that damage exists
- Connects that damage to a specific hail event
- Demonstrates severity and scope
- Justifies repair or replacement costs
Think of it this way: your documentation is your argument. And the better your argument, the harder it is to push back against it. There’s also a psychological layer. Clear, organized documentation signals professionalism. It tells the adjuster you understand the process. And that alone can influence how seriously your claim is handled.
When to Start Documenting Hail Damage
Immediately. That’s the short answer.
But let’s add context.
You should begin documenting as soon as it’s safe because:
- Evidence fades granules wash away, marks soften
- Storm timelines are easier to verify quickly
- Insurance carriers expect prompt action
That said, safety comes first.
Before inspecting:
- Look for downed power lines or debris
- Avoid climbing on wet or unstable surfaces
- Use binoculars or zoom if needed
If anything feels risky, wait. Or call a professional. A claim isn’t worth an injury. Timing also affects credibility. When documentation happens quickly, it aligns naturally with weather reports and claim timelines. Delay creates gaps and gaps invite questions.
Tools You Need to Properly Document Hail Damage
You don’t need a full inspection kit. But you do need a few essentials.
| Tool | Why It Matters |
| Smartphone or camera | Clear, high-resolution photos |
| Chalk | Highlights damage points |
| Measuring tape | Shows size and scale |
| Ladder with stabilizer | Safer roof access |
| Notebook or notes app | Logs observations |
| Drone (optional) | Captures hard-to-reach angles |
The key isn’t the tools it’s how you use them. A well-used smartphone beats expensive gear used poorly. One more tip: clean your camera lens before shooting. It sounds simple, but it dramatically improves clarity.
Step-by-Step: How to Document Hail Damage for an Insurance Claim
This is where precision matters. Follow these steps carefully.
Step 1 – Capture Wide-Angle Photos of the Property
Start broad.
Photograph:
- Each side of the home
- Entire roof slopes
- Detached structures
These images provide context. They show the overall condition of the property and help adjusters understand where damage is located. Take photos from multiple positions front yard, backyard, street view. The goal is coverage, not perfection.
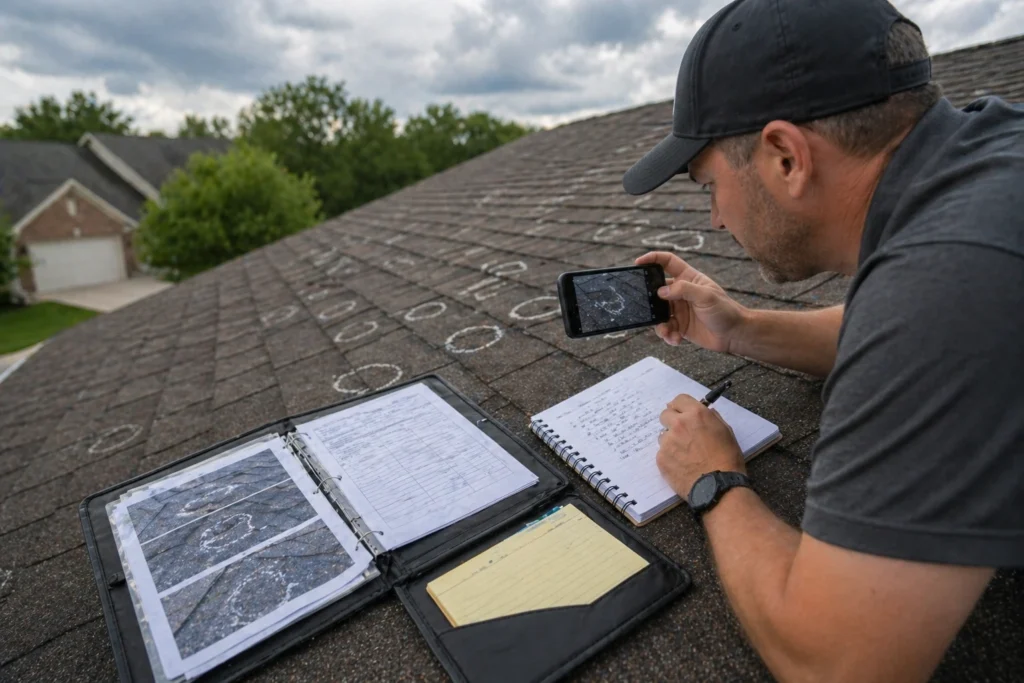
Step 2 – Take Close-Up Photos of Impact Marks
Now get detailed.
Look for:
- Circular dents on shingles
- Granule loss exposing asphalt
- Soft spots or bruising
Take multiple photos of each damaged area. Change angles. Adjust lighting. Make the damage undeniable. If needed, use your finger or a tool to gently show the depth of a bruise but never cause additional damage.
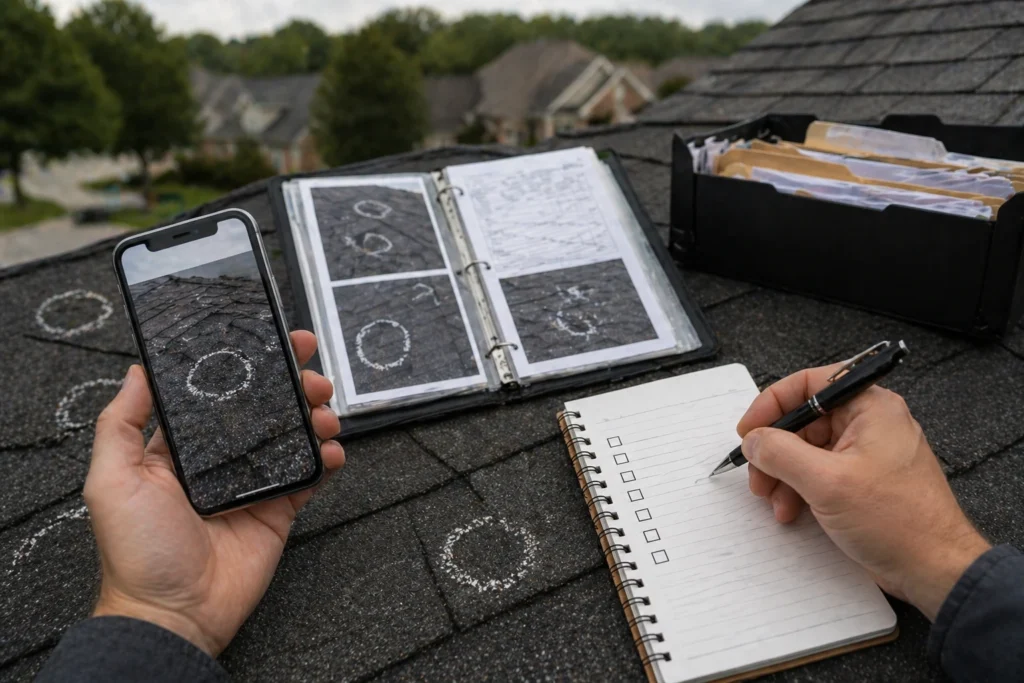
Step 3 – Mark Damage for Clarity
Use chalk to circle impact points. Why? Because unmarked damage can be hard to see in photos. Marking makes it obvious. But don’t overdo it. Only mark confirmed hits. Too many markings can weaken credibility. Think quality over quantity.
Step 4 – Document Soft Metal Damage
Soft metals are your strongest evidence.
Focus on:
- Gutters and downspouts
- Roof vents
- Flashing
- HVAC units
Metal dents reveal hail size and direction. Insurance adjusters rely heavily on this. If your metal components show no damage, your claim may face more scrutiny so document them carefully.
Step 5 – Record Collateral Damage
Hail doesn’t isolate itself to the roof.
Check:
- Window screens
- Siding panels
- Fences
- Outdoor furniture
Consistent damage across surfaces strengthens your claim significantly. Even small dents or chips matter. They support the overall narrative.
Step 6 – Create a Damage Log
Photos show. Logs explain.
Include:
- Inspection date and time
- Number of hits per area
- Type of damage observed
- Notes about the storm
This turns your documentation into a structured, professional report. A simple note like “12 impacts on south slope, visible granule loss” can carry serious weight.
Advanced Documentation: Going Beyond the Basics
If you want to stand out and get better results you go further. Here’s how.
Use Video Walkthroughs
Walk around your property and narrate what you’re seeing. This adds context photos can’t capture.
Capture Measurements Clearly
Use a tape measure in your photos to show dent sizes or damage areas.
Document Multiple Roof Slopes Separately
Each slope may have different damage levels. Treat them individually.
Use Time-Stamped Files
Make sure your images include date and time metadata.
Take Sequential Photo Sets
Start far, move closer, then zoom in. This progression helps tell a visual story. These extra steps elevate your documentation from average to professional-grade.
How Insurance Adjusters Evaluate Your Documentation
Adjusters are trained to look for patterns.
They want to see:
- Consistent damage across surfaces
- Evidence that matches hail characteristics
- Alignment with storm reports
They also look for inconsistencies. For example:
- Damage only on one slope
- Marks that resemble wear and tear
- Lack of supporting evidence
If your documentation is scattered or unclear, they’ll question it. If it’s organized and detailed, they’ll rely on it.
Common Mistakes Homeowners Make
Even good intentions can lead to poor results.
Avoid these mistakes:
- Taking blurry or dark photos
- Missing entire sections of the roof
- Ignoring soft metal damage
- Waiting days or weeks to document
- Failing to organize files
- Relying only on memory instead of written notes
Mistakes don’t just slow down your claim they reduce its value.
How to Strengthen Your Hail Damage Documentation
Let’s make your claim stronger.
Do this:
- Take more photos than you think you need
- Use consistent angles for comparison
- Store files in labeled folders
- Back everything up online
- Keep notes alongside images
Also, rename your files clearly. Organization isn’t optional. It’s part of the process.
Understanding What Counts as Valid Hail Damage
Not all damage qualifies.
Functional Damage
- Impacts performance
- Leads to leaks or deterioration
- Usually covered
Cosmetic Damage
- Affects appearance only
- May not be covered
Roof Type Differences
| Roof Type | Common Hail Damage |
| Asphalt shingles | Granule loss, bruising |
| Metal roofs | Visible dents |
| Tile roofs | Cracks or fractures |
Focus your documentation on damage that matters. Understanding this distinction helps you avoid wasting time documenting irrelevant details.
Roof-Specific Documentation Strategies
Different materials require different approaches.
Asphalt Shingles
- Look for granule loss and soft spots
- Press lightly to detect bruising
Metal Roofing
- Focus on dent patterns and spacing
- Use reflection angles to highlight damage
Tile Roofing
- Check for cracks and displaced tiles
- Document broken edges clearly
Each material tells a different story. Your documentation should match it.
What to Do After You Finish Documenting Damage
You’ve done the hard part. Now organize it.
Steps:
- Sort photos by location
- Match logs with images
- Compile into a single folder
- Contact your insurance company
- Submit everything clearly
And one more thing don’t rush repairs. Wait until your claim is reviewed. Premature repairs can complicate your claim.
When Documentation Isn’t Enough
Even perfect documentation can face challenges.
Claims get denied because of:
- Policy exclusions
- Disputes over cause
- Incomplete submissions
- Adjuster disagreement
This is where persistence matters. Documentation gives you leverage but you still need to use it.
The Supplement Process: When More Documentation Is Needed
Sometimes, the first inspection isn’t enough.
This leads to a supplement.
A supplement is an additional claim request based on:
- Missed damage
- Underestimated costs
- Newly discovered issues
To support a supplement:
- Take additional photos
- Update your damage log
- Provide contractor estimates
This is where strong documentation really pays off. It allows you to push back with confidence. Many homeowners researching Select Hail Damage Roof Insurance Claim: How to Protect Your Roof Hail Damage Roof Insurance Claim: How to Protect Your Roof often overlook this stage, but it’s one of the most critical parts of maximizing a claim.
How a Public Adjuster Helps Strengthen Your Case
A public adjuster brings experience.
They:
- Identify missed damage
- Build detailed estimates
- Speak the insurer’s language
- Negotiate on your behalf
For homeowners in Denton dealing with complex claims, this can completely change the outcome. They don’t replace your documentation they enhance it.
Real Scenario: Strong vs Weak Documentation
Let’s compare.
Weak Case:
- Few photos
- No metal damage documented
- No notes
Result: Partial payout. Disputes.
Strong Case:
- Detailed photos
- Full property coverage
- Organized logs
Result: Full approval.
Same storm. Different preparation.
Pro Tips to Maximize Your Claim
Want better results?
Follow these:
- Document immediately after storms
- Capture every detail even small damage
- Keep communication records
- Stay organized
- Don’t rely solely on insurer inspections
Consistency beats shortcuts every time.
Final Thoughts: Documentation Determines Everything
At the end of the day, your claim outcome comes down to one thing documentation. If you understand how to document hail damage for an insurance claim, you take control. You present the evidence. You guide the process. And in storm-prone areas like Denton, that control matters more than most homeowners realize. Do it right the first time. It pays off.
FAQs
As soon as it’s safe, ideally within 24–48 hours to preserve accurate and time-sensitive evidence.
Clear, well-lit photos of roof damage and soft metal impacts are the most critical pieces of evidence.
Yes, but your chances of approval or a full payout drop significantly without proper documentation.
No, a smartphone with a good camera is usually enough if you take clear and detailed photos.
Focus on functional damage like granule loss, dents, and cracks that affect the roof’s performance.
Yes, lightly marking damage with chalk helps highlight impacts and makes them easier to identify.
You can still add documentation later, especially during the supplement process.
Yes, strong documentation helps support your claim and can influence the adjuster’s assessment.
Yes, even minor damage can lead to long-term issues and may be covered depending on your policy.
If your claim is denied, underpaid, or complicated, a public adjuster can help strengthen your case.